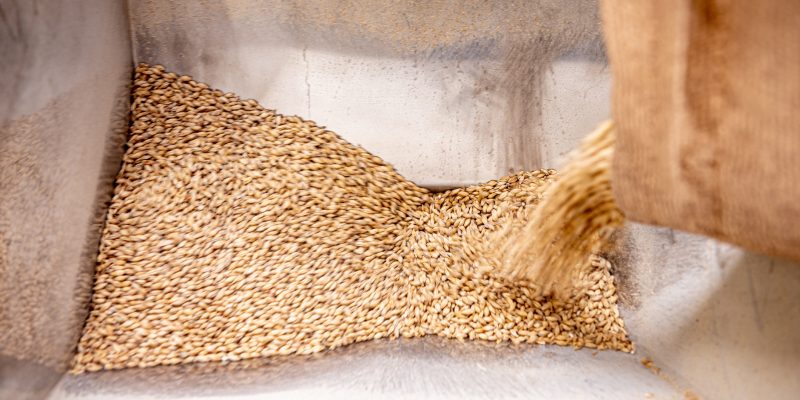
For breweries that dry mill their malt and separate their wort in a lauter tun, getting a good crush is important. In brewing, there is a tradeoff in milling. The finer the grains are milled, the faster their starches will dissolve and the quicker these starches will be degraded into sugar, thus resulting in higher yield. On the other hand, finely-crushed grains result in a tight, less porous, filter bed compared to larger particles. As such, wort flow rate through the filter bed is slowed resulting in a longer lautering time. The exception to this is when a Mash Filter is used, instead of a lauter tun.
A workable compromise can be found by trial and error. A brewer could mill coarsely at first and then — on subsequent batches — crush progressively more finely to get better extract efficiency, and continue with this approach until lautering problems are encountered. The trial and error methods works in practice, but there is an objective way to measure the mill output and find the “sweet spot” without repeated tests. This method involves sifting the mill’s output through a series of sieves and weighing the amount of material retained on each sieve.
Sieves come in a variety mesh sizes and these sizes are described, in the United States, by the US Standard Sieve series. Higher number sieves retain smaller pieces of material than lower numbered sieves. Sieves are typically made from brass or stainless steel, with brass being cheaper. They are produced in a variety of diameters, for a wide variety of applications. The 8-inch sieves are the preferred size for malt analysis. They also come in full height and half height versions, with half height being proscribed by the ASBC (American Society of Brewing Chemists) for malt analysis.
Standard sieves are available online from a variety of sources. They currently start at around $45 per sieve, with an additional roughly $40 required for the pan and cap, respectively.
To analyze the output of the malt mill, a set of three sieves — #14, #30 and #60 — is the minimal basic setup. A pan to collect material that flows through all of the meshes is also required. So is a cap to cover the top sieve. In this sieve set, the #14 sieve would sit on top and retain coarse husk pieces, but let the grits and flour fall through. The #30 sieve below it would retain coarse grits while letting fine grits and flour fall through. The #60 sieve on the bottom would retain the fine grits. Flour would fall through and land in the pan.
Large breweries may employ a larger set of sieves — #10, #14, #18, #30, #60 and #100. Briggs, Hough, Stevens and Young [i] additionally give a series of Pfungstadt Plansifter sieves numbered 1 through 5 that have roughly the same mesh size as the #14, #18, #30, #60 and #100 sieves.
Procedure
To test the mill output, collect about 240 mL (roughly a cup) of milled malt as it falls from the mill. Do not scoop a cup out from a pile of milled malt as the smallest grits and flour will have already settled in the pile. Sample the malt from the “stream” coming from the mill. The total weight of the sample should be 100–130 g. Weigh each of the sieves, and the pan, when they are empty. Stack the sieves in a series progressing from the coarsest sieve on top to the finest on the bottom, and the pan underneath them. Pour the milled malt on the top sieve and add the cap.
In order for the procedure to work properly, all the material that can fall through each sieve must fall through. This means that, at some point, each little piece of grain-derived material needs to contact the sieve mesh. If, for example, some fine grits end up resting on top of some husk pieces in the #14 sieve, they will be weighed along with the other material retained by the #14 sieve.
To make sure everything that can fall through a sieve does fall through, it is important to shake the sieves — hard. Some breweries have dedicated mechanical shakers for this. If shaking by hand, shake the assembly for 3 minutes, rapping the whole assembly on a hard surface a few times each minute.
After the shaking, weigh each sieve again and subtract the weight of the empty sieves to get the weight of the malt retained on each sieve. In order to achieve a reasonable level of precision, the balance will need to be capable of weighing to the nearest gram. Being able to weigh to the nearest 10th of a gram is preferable. Next, divide the weight of the malt in each sieve by the sum of all their weights to get the percentage weight retained on each screen and in the pan. Record these numbers to compare with later testing. A visual description of this test is available ( https://www.youtube.com/watch?v=Sc3F0jYinoo&ab_channel=MaltAcademy ).
An optimal achievable particle size distribution will vary depending on factors such as the type of dry mill (e.g. two versus four vs six rollers). Opinions vary on what constitutes an optimal crush. Bob Hansen from Briess, in his technical presentation on practical milling, gives 53.4% of the malt retained on sieve #14, 27.6%, on sieve #30, 10.6# on sieve #60 and 8.4% in the pan as the results of a normal grind. Dave Miller, on his webpage of mills and milling, gives the results of a brewpub 2-roller mill as 58.3%, 24.0%, 8.3% and 9.3% for the same series of sieves. He gives 54.2%, 30.5%, 8.5 % and 6.8% as numbers for a larger brewery with a 4-roller mill.
If the results are in the ballpark of these numbers, it is likely to have hit a workable tradeoff between the fineness of the crush (extract yield) and lauterability. If the numbers show more material retained on the coarse sieves, the extract efficiency could likely be increased significantly by tightening the mill gap. This should have little impact on lauterability.
There are studies that help to illustrate differences in results one might obtain. For instance, Hansen gives 78%, 14%, 4% and 4% as an example of a coarse grind). On the other hand, if there is less material on the coarse screens, the efficiency is likely to be slightly better, at the expense of lauterability. Hansen gives 25%, 25%, 31% and 20% as an example of a fine grind. The time required to collect the wort from this mash was 50 minutes longer than that from the coarse or normal grind. Using the larger set of sieves, Jospeh Dougherty gives the following as typical for breweries using 6-roller mill — #10 13%, #14 20% #18 32%, #30 24%, #60 6%, #100 2%, and in pan 3%.
Analyzing the mill output is not something a brewery is likely to do for each brew. But, it can be important when the brewery is having problems with brewhouse efficiency, when the malt specs change, or if the brewery gets a new mill. And, even without any changes, it can be good to check the mill’s output occasionally as settings may drift over time. Experimentation with slight adjustments in the mill gap will enable the brewery to achieve getting the best crush for the brewery, and with that, reduce production costs and optimize the brewing schedule.
By Dr. Chris Colby
[i] Briggs, Hough, Stevens and Young, “Malting And Brewing Science: Volume 1” (1971, Kluwer)
[ii] https://www.brewingwithbriess.com/wp-content/uploads/2021/01/Briess_2007CBC_Practical_Milling.pdf
[iii] http://brewlikeapro.net/maltmilling.html
[iv] Joseph J. Dougherty, Wort Production in: “The Practical Brewer: A Manual for the Brewing Industry” (Master Brewers Association of the Americas, 1997)